Sunday, May 5, 2013

DIY Gold Bookshelf

I've been on the hunt for a gold bookshelf and haven't been able to find one under my budget of $100. Maybe because the color is associated with luxury, all gold furniture I've run into seems to be very pricey.... and you know what that means, a DIY project.

Instead of starting from scratch, I decided to do another Ikea hack. I wanted something very simple, and let's face it, cheap. I found the Ikea Vittsjo for $40. Here's what it looks like before I got to it.
All I did was spraypaint the bookshelf frame, but spray painting is not as easy as it sounds. here are the Materials I used: White Primer Spray Paint, Gold Spray Paint, and 180-250 Grit Sand Paper. Optional: mask


DIRECTIONS
  1. Find an open area like a backyard or garage. If you choose to do it in a garage like I did, make sure to keep the garage door open as spray paint fumes are not good for you!
  2. Keep in mind that there will be "overspray" which is spray paint residue that will get everywhere and looks like a light powder, so make sure there is nothing nearby that can get accidentally sprayed in the process. Make sure to put tarp, cardboard or some sort of material to protect your floor.
  3. Assemble the book shelf but do not put the glass shelves on. You can put the 2 top and bottom wood boards, or you can spray paint them separately.
  4. Wipe down the book shelf and make sure it's completely clean and free of dust or other dirt.
  5. Prime the bookshelf with white primer. When you spray paint, the key is to do a very light coat about 6-8" away in an up and down or right to left motion. 
  6. Let the first layer of primer dry (about 10 minutes) and then do another layer or 2 until the bookshelf is white. Again, make sure you don't spray too close or too heavy or else the paint will drip and you will see that texture.
  7. After the primer is dry, lightly sand the entire shelf t make sure the surface is smooth. Wipe down any sanded residue.
  8. Take your gold spray paint and spray one light layer. Again, make sure to stay about 6-8" away and keep it very light or else your paint will drip.
  9. Let the first layer dry and do another layer or 2 until you get the color you like. I did 3 layers. 

DRIP TIP
This was my first time spray painting a piece of furniture and I did mess up in a couple of places where I spray painted too close or too heavy where the paint dripped. In order to fix this, i took a stronger sandpaper (60-80 grit) and sanded off the paint where it dripped and had an uneven texture. Once it was smooth, I re-primed with white and then spray painted with gold. It blended in pretty well, so don't worry too much if you mess up and have to do this. 

Here's the final outcome styled with some of my favorite books, sculptures, and albums!


Tuesday, April 23, 2013

Coachella Recap

So this entry isn’t the usual “Savvy or Savory” type post, but I did mention in my very first entry that this blog would also touch on the other major interests in my life like music and traveling. I haven't been to Coachella since 2007, so I was super stoked to make a return. First let's start off with some pictures of my rad friends that I shared the experience with and the fashion choices of course:


My Top 3 Performances

1.       Disclosure – "Latch" feat. Sam Smith. This song closed all of Coachella for me. It was the last song I heard on Sunday and was my absolute favorite performance! This song is currently on repeat. They also performed "Running" with special guest Jessie Ware. Here is a link to the official video as the performance below sounds a little choppy and does not do the live performance justice.


2.       Allen Stone – "Is This Love?" This is one of my all time favorite songs, originally sang by Bob Marley. Allen Stone's voice is so powerful and full of soul. He is one of those rare artists that sounds even better live than on their album. I couldn't find a video of the Coachella performance, so below is the music video version of it but here's a link to his life performance of another great song "Satisfaction" which was the last song he performed at Coachella. And if you have Spotify, check out his live session of "What's Going On."


3.       Yeah Yeah Yeahs – "Heads Will Roll". When my friends and I heard this song we went crazy!! Too good!!! Here's their performance of Maps leading into Heads Will Roll:

 
Other amazing artists/bands/djs I got to see:

·         Jessie Ware – Such a class act. My favorite songs were Wildest Moments, If You’re Never Gonna Move & Valentine which she brought out her drummer to sing with her, who was also an amazing singer!
·         The XX – Definitely more mellow, but they sounded just like they do on their album. Crystalised, Islands & Shelter were my faves.
·         Bingo Players – These DJ’s really took me by surprise. I only knew their one song “Cry” on the radio but all of their jams had me dancing non-stop!
·         Dog Blood – Skrillex and Boyz Noise, how could you not like them?
·         Simian Mobile Disco – I’ve always liked this DJ duo, but none of my friends really knew who they were. It caught them by surprise at how good they were. They’ve got a totally different sound and I can’t explain it, you’ll just have to listen to their stuff.
·         Dillon Francis – This was the first performance I saw and it definitely set the mood for the weekend. When I.D.G.A.F.O.S. came on, the whole crowd was definitely going HAM.
·         Baauer – The infamous guy who brought us the Trap song sensation “Harlem Shake”… I thought he’d be a one hit wonder, but I have to admit all his songs had me dancing hard.
·         2 Chainz – We all know who this is and unfortunately in my book, rappers have never really impressed me live. They always seem to sound gargled and all over the place, but 2 Chainz definitely impressed me. He sounded so clear and had every person in the crowd singing his every lyric.
·         Major Lazer – Diplo is just such a creative mind and all that he does is so refreshing. I’ve seen Major Lazer live before, and they just get better and better. They definitely make you  bust out all kinds of dance moves.
·         Phoenix – Although I like Phoenix, and they sounded great live, their performance was super disappointing. First off, Daft Punk didn’t come on with them as rumored and instead R. Kelly did. R. Kelly’s guest performance, again sounded good, and might have been better received if everyone wasn’t expecting Daft Punk, but it was just odd. He is the polar opposite of Phoenix and caught everyone off guard. Another reason why I was so disappointed is that they didn’t play my favorite song, which is most of the older fans’ favorite song as well, “If I Ever Feel Better.”
·         Alex Clare – Alex Clare is just starting to come up because of his hit “Too Close.” His voice is so powerful and soulful, definitely not what you would expect from looking at him.
·         Pretty Lights – Of course the lights were amazing on this set. When “Finally Moving” came on, the crowd went wild. Some people don’t appreciate instrumentals, but it’s hard not to fall in love with Pretty Lights.
·         Red Hot Chilli Peppers – Of course we had to check out RHCP. I grew up with them and there’s nothing like knowing all the lyrics to all their songs and singing along. They guys are getting old, but they still sound just like they did 10 years ago. Still rocking out, hard!
·         La Roux – This chick is just so cool. The way she sings, walks along the stage, everything about her emulates fierce. She started with “In For The Kill” and I was hooked.


Check out more Coachella performances here: http://www.youtube.com/user/coachella/videos?view=0

If you’ve ever been to Coachella, you know that it’s impossible to see every single act because there are 6 different stages with performances going on simultaneously. Below are the artists I was super bummed to miss! Wish I could’ve gone again Weekend 2 to check out the ones I didn't get to!
·         Four Tet
·         The 2 Bears
·         Two Door Cinema Club
·         Dub FX
·         Richie Hawtin
·         Maya Jane Coles
·         Local Natives
·         Vintage Trouble
·         Julio Bashmore
·         Sigur Ros
·         Knife Party
·         Wu Tang Clan

More Coachella Pictures


Wednesday, April 10, 2013

Ikea Hack Part 2 - Matching Dresser

In my earlier post, I showed you how to do an Ikea Hack on the Rast 3 Drawer Chest with a little painting and staining. There is no matching Rast Dresser, but the Ikea Tarva 6 Drawer Chest is pretty darn similar. It is a little pricey at $150, but all other 6 drawer chests I liked started at $250 or more. Here's what it looks like after assembling it.
I'm sure you can get even more savvy on this part and find cheaper unfinished furniture or a thrifted dresser to re-finish, but all-in-all I'm still saving at least $100 for a brand new dresser that looks so much more expensive. I plan to utilize it as a TV stand in my Master Bedroom as well. Here's how it turned out after following the same steps as finishing the night stands in my previous post:


And here's the Tarva Dresser with the 2 night stands I made to match, oh and my Assistant Rambo too.


Keep checking back on my blog for my next DIY project with bookshelves.


Monday, April 8, 2013

Coachella Essentials - Full Outfits for Around $50

With Coachella coming this weekend, my girlfriends and I have been stressing about what to wear. The last time I went to Coachella was in 2007 and people weren't too worried about what to wear, but much more concerned about the music and staying hydrated. Now it's become like one big fashion show. I'm still going for my favorite bands and hoping Daft Punk will show up, but that doesn't mean I can't look fab on a budget. Here are some essential trends and full outfit ideas for around $50:

INDIAN PRINTS AND BRIGHT COLORS
American Indian prints and Crop Tops are all the rage, and this cute one from F21 is the perfect combo for the desert sun.  The bright yellow shorts and printed sandals complete the look but be careful wearing sandals, you will get stepped on in those crowds!

Top: Forever 21 ($25), Shorts: Forever 21 ($15), Sandals: Foreign Exchange ($17), Glasses: vintage ($2)

TRIBAL PRINTS, HIGH WAISTED DISTRESSED SHORTS & FRINGE
Similar to the Indian print, bold tribal patterns are a great way to make a statement. This scoop-neck cap-sleeved crop top pairs perfectly with high-waisted distressed shorts and fringe moccasins. 

Top: G-Stage ($7), Shorts: vintage ($10), Sunglasses: H&M ($8), Shoes: Minnetonka ($45)

ARMY PRINT, OMBRE & SNEAKERS
Army print, ombre and acid wash are another fun trend popping up. I've personally loved army print since I was in high school, so I'm stoked that it's coming back. This look with the geo-print sneakers is not for the girly-girls, so it's definitely not for everyone.
Tank Top: Foreign Exchange ($13), Shorts: Foreign Exchange ($38), Shoes: Forever 21 ($25), Sunglasses: Carrera (vintage hand me downs)

WILD ANIMALS, MUSCLE TEES & NEON
For those not brave enough to wear the itty bitty crop tops, muscle tees are the perfect solution. Crazy animals like cats and bulls lend the perfect graphic. They're loose and comfy, but still a little sexy with the deep arm openings. I like to pair my muscle tee with a neon bra or swimsuit top under for a pop of color and patterned shorts.

Top: G-Stage ($12), Bra: G-Stage ($5), Shorts: G-Stage ($9), Sunglasses: vintage ($2), Booties: Forever 21 ($25)

OTHER TIPS

  • Check the Coachella Venue Do's and Dont's here http://www.coachella.com/festival-info
  • Bring Sunscreen
  • Bring a light jacket/sweater for when it gets cold at night.
  • Stay hydrated. It's going to be close to 100 degrees!
  • Make a schedule of Bands you want to see. A lot of the bands overlap so it's impossible to see everything. Prioritize and give yourself some time to get to the other stages.
  • Designate a meeting spot and time if you have a group, it's hard to stick together and people want to see different things, so it's good to have a meeting spot and time for your group. I'm definitely going to practice the buddy system and be with at least be with 1 or 2 people at all times.
  • Bring a little purse/fanny pack or have deep pockets to keep your essentials: money, gum, touch-up make-up, oil-wipes, etc.

Wednesday, April 3, 2013

Savory Pita Pizzas

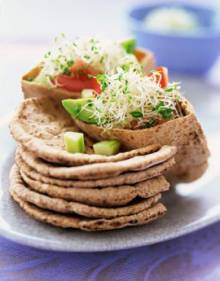
Now that I've touched on the Savvy part of my blog, I wanted to introduce the Savory. I've been trying to eat healthier and one of my favorite, quick and relatively healthy recipes are Pita Pizzas. It literally takes about 10 minutes to make and you can put any toppings you want.


Here's what you'll need:
  • Whole Wheat Pita Bread (or regular pita bread if you prefer)
  • Sauce: Tomato Sauce, Pesto, EVOO, anything you want
  • Shredded Cheese: Mozzarella works great, but any should do
  • Toppings: Go crazy! I usually throw in mushrooms, onions, garlic, sun-dried tomatoes, chicken breast chunks and any other veggies or meats you like
DIRECTIONS
  1. Lay out your pita bread and spread sauce on
  2. Add shredded cheese (don't add too much or it'll become soggy)
  3. Add toppings
  4. Pop in the toaster oven or regular oven at 350 degrees for about 5-10 minutes. Make sure you watch it because the cooking time really depends on how fast the toppings cook. The pita bread cooks relatively fast.
  5. Let it cool down for a few minutes and enjoy!
OTHER PITA IDEAS
  • Savory Pita Calzones: most pita breads open up and have a pocket inside. You can stuff the pita bread just like you would a pizza and toast it the same way for a pita calzone
  • Dessert Pita Pizza: If you're a sweet tooth like me you can spread nutella or cookie butter on the pita bread, add your favorite nuts and fruits like strawberries and bananas, then toast for a few minutes. This one isn't healthy, but it sure is good!
  • Pita Sandwich: Just like a regular sandwich without all of your fixings falling out when you take a bite of it.

Buen Provencho!

Monday, April 1, 2013

DIY Ikea Hack

In my last post, I found a steal of a bed, but even with saving over $600, spending almost $700 on a bed is still a lot of money. I wanted to finally graduate from Ikea onto better quality furniture, but hey some times you just have to make it work. I'm investing more money (while still finding a deal of course) on the main pieces, and going to Ikea or consignment stores on the smaller pieces. I've been seeing a lot of Ikea Hacks on Pinterest so I decided to try my hand at it. I got 2 of the Ikea Rast 3 Drawer Chest which were only $35 each and in an unfinished wood. Here's what it would look like standard.

For this ikea hack, I bought all my supplies at Lowe's except for the new knobs:
  • Valspar Ultra White Semi-Gloss Paint (1 quart)
  • Minwax Wood Finish Stain in Provincial (1 quart)
  • Minwax Semi-Gloss Polyurethane (1 quart) 
  • Knobs from LeeValley.com
  • Foam brushes (roller and hand brush)
  • Sanding Block or Sand Paper 200-220 Grit (not pictured)
  • Old towel or t-shirt to wipe off stain (not pictured)

The Lowe's employees in the paint section are always very helpful, so use the free help if you're not super knowledgeable like me. They tested different stains and paints for me so I could make sure I liked what they looked like when dry. They also recommended supplies and gave me tips. One tip I have to share is to make sure to use the same material brush if you're using more than one, as the different brush strokes will show. I used a roller brush to cover more surface and then a small hand brush for the corners and for staining, so i made sure both brushes were foam. Now for the dirty work...
The first step was to put the ikea night stand together. It's much easier to paint and stain when it's put together. 
  1. Wipe down the drawers and make sure there's no dust. I used the roller brush to paint the cover of the drawers white. I painted each drawer 3 layers to get that white color I wanted. Make sure to follow the instructions on drying time between each paint layer. 
  2. For the frame, lightly sand the surface and wipe off all the residue with a towel, or in my case an old t-shirt. 
  3. I used the foam hand brush to lightly paint the stain on. Follow the steps on the stain. This stain said to wait 10-15 minutes then wipe the excess stain off after with a towel. I was happy with the color after one layer, but you can opt to do another layer of stain if you want it darker.
  4. After the stain was dry, it was time to seal the stain with polyurethane. It's important to use very light layers and make sure there is no excess drip because it will dry like that and look like gobs of glue. For this brand, it recommended 3 layers of polyurethane with a 2 hour dry time between each layer. Follow the directions; after the first layer dried, I did a light sand, wiped off the excess, and brushed on another layer of polyurethane. I repeated this and on the 3rd final coat, you don't have to sand it down, just let it try for at least 24 hours.
  5. The final step was to screw in my own knobs since I didn't like the ones it came with. They have a variety at Lowe's and Home Depot.
And here is the final product. I absolutely love how rich the stain came out and how the white paint and gold knobs give it a modern feel.

Would you have ever guessed that this started as a $35 Ikea Drawer Chest? With just a few more bucks and some sweat equity, I think these new night stands will look fab with our new bed, and dare I say, look expensive too. We also made a matching dresser which will double as a TV stand, so watch out for that on the next post...

Thursday, March 28, 2013

Savvy or Steep?

     One of the main things on my blog will be about my "frugalista" side and attempting to design my own home, so I thought I'd share the recent deals I found putting together my new King Bed. My inspiration came from the "High Low Project" on HGTV, where desinger Sabrina Soto would show her clients the creme de la creme of furniture and decor, and then find a much cheaper and similar substitute within budget. I call my version, "Savvy or Steep?" First let's start off with my bed frame.


     The initial bed I wanted was the ZGallerie Jameson Bed but it was out of my budget at $1299 since I just splurged on a Tempurpedic Mattress. I shopped around and finally found this Skyline Tufted Wingback Bed with nailhead details online from Wayfair . When shopping online, make sure that the website you are purchasing from is reputable and try to look for specific product reviews. Wayfair is a newer site, much like Amazon and is one of my favorite places to shop at for home furniture and decor. All the reviews on this bed were great, plus there was a sale at the time, so I went ahead and purchased it and boy am I glad I did! The Eastern King was $680 when I bought it on sale and is currently $750, which saved me over $600 from the original ZGallerie bed I wanted! I absolutely love my bed. It's not just a headboard, it has an entire bed frame. For my Tempurpedic mattress I also needed to purchase a box spring. The bed is made of fabric with gorgeous tufting and silver nailheads along the sides. I actually like it better than the ZGallerie option because I didn't like the curves on the headboard. I'm so excited about this purchase you don't even know. It has everything i wanted, the soft grey fabric, tufting and nailheads!

     I also went on a hunt for the perfect and affordable duvet cover and sheet sets. I had my heart set on the West Elm Striped Duvet but they were $137 for a king duvet and 2 king shams, so I shopped around and of course Target comes to the rescue! I found the most similar set for just $30 and it came with the king duvet and 2 king shams! Ultimate steal! Unfortunately the Target sheets aren't on the website anymore, but I just saw some at the local Target in the clearance section for $10! It comes in Navy Blue as well. I thought the sheets would be stiff because of the price, but they were really soft, too. The only downside is that the striped print is only on the top of the duvet and pillow case, the back is all white, so if you fold your sheet over, it will be all white. It wasn't a big deal for me because I wanted to get a fun and contrasting sheet set to go under and that would cover the fold anyway.
     My last savvy find was the sheet set. I love how grey, white and yellow go together and I found these beautiful Dwell Studio Citrine Sheets but they were $345!!! That was like triple the price of the West Elm Duvet set which I already thought was too expensive, so of course I had to go back on the hunt. I found these amazing Elite Home Rutherford Bronze Sheets on Amazon for $43. I really wanted more of a mustard color, but it was still in the same yellow/gold color tones and I absolutely loved the geometric link pattern, so I went for it. The sheets are a little stiff at first, but after a few washes they're just what i needed.
     There are a few things I'm obsessed with: the colors green & grey, linen furniture, tufting, stripes and bold geometrical patterns, and nailheads. So excited to say i was able to incorporate it all into our new King Bed! I still want to add some splash of emerald green in there, maybe with some Euro Shams. We'll see.  

The Tempurpedic mattress was definitely a splurge, but as much as I love a deal, a good mattress is not something to skimp on. We spend so much of out lives sleeping, that I think a quality mattress is something worth spending on. Please ignore the bright green background, I'm moving to a new place in June which will have a white or light wallpapered wall and I'm trying to transition from dark furniture to lighter furniture to make the rooms look more airy. Here are before and after pictures:


     Stay tuned for my next project... getting rid of the black nightstands with a DIY Ikea Hack to go with the new bed.